Water evaporation is one of those constant battles that aquarium owners deal with daily. I remember checking my tank every morning, topping it off manually, and wondering if there was a better way to manage this never-ending task. The water level drops, salinity shifts, and suddenly your carefully balanced ecosystem feels less stable. An automatic top-off system changed everything for me. No more guessing, no more manual refills at odd hours, just consistent water levels that keep my fish and corals thriving. This article covers everything I learned about ATO systems and why they matter.
Content Table
Aquarium ATO system review
Aquarium ATO System
An ATO system stands for Automatic Top Off system. Think of it as a smart assistant that monitors your aquarium water level around the clock and adds fresh water exactly when needed. The concept is straightforward but incredibly effective.
When water evaporates from your tank, it leaves behind salt and minerals. This changes the salinity and concentration of everything dissolved in your water. Fish can handle small fluctuations, but corals and invertebrates? They need stability. An aquarium ATO system review will show that these devices solve the problem by automatically replacing evaporated water.
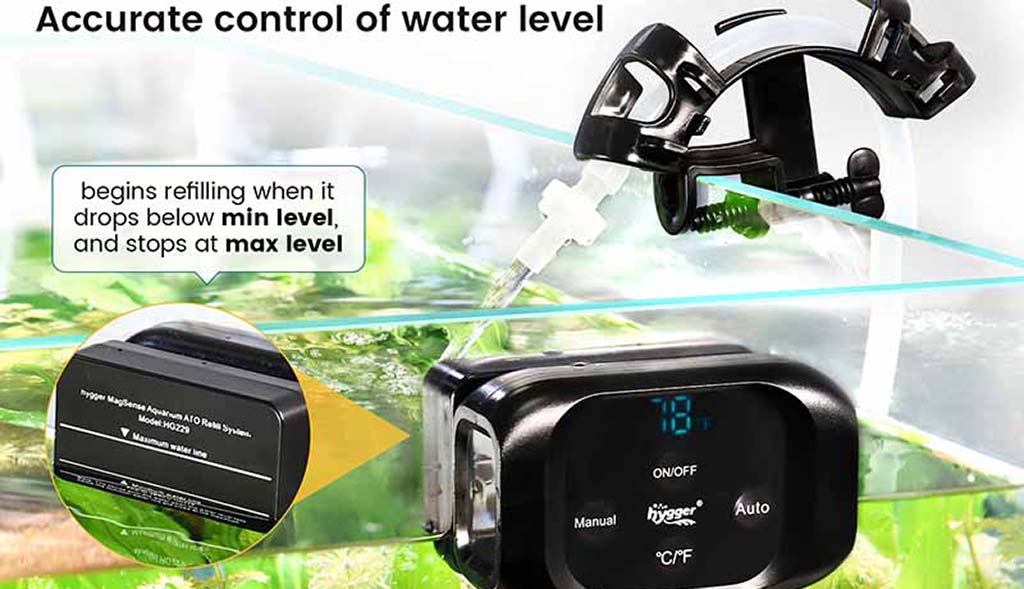
The system uses sensors to detect when water drops below a certain level. Once triggered, a pump activates and refills the tank until the water reaches the proper height again. Then it stops. Simple, effective, and hands-off.
A Good ATO Refill System
Not all ATO systems work the same way. The good ones share certain characteristics that separate them from cheap alternatives that might flood your floor or fail when you need them most.
A quality ATO refill system operates on a dual-sensor principle. One sensor detects the minimum water level, another tracks the maximum. This creates a specific range where your water level stays consistent. When the water level drops to the minimum sensor level, the pump starts. When it reaches the maximum sensor, the pump stops.
Key characteristics of a reliable system include:
- Real-time monitoring that never sleeps
- Fail-safe mechanisms to prevent overflows
- Accurate sensors that ignore bubbles or wave interference
- Temperature monitoring as a bonus feature
- Manual override options for water changes
- Reservoir detection to prevent dry running
The working principle centers on magnetic induction technology in better models. This matters because optical sensors can get fooled by bubbles, salt creep, or algae buildup. Magnetic sensors remain accurate regardless of these common aquarium issues.
ATO Refill System
What Tanks Require the ATO Refill System
There is a misconception that ATO systems were only for reef tanks. Wrong. Multiple tank types benefit from automatic top off.
- Reef tanks
Corals demand stable salinity levels. Even small fluctuations stress them out and can lead to tissue recession or bleaching. When I switched to an ATO for my reef setup, I noticed my corals extending their polyps more consistently.
- Saltwater fish-only tanks
Saltwater fish-only tanks also benefit significantly. While fish tolerate salinity changes better than corals, consistent parameters still reduce stress and improve long-term health.
- Freshwater planted tank
Freshwater planted tanks experience evaporation, too. The water level affects filter performance, heater accuracy, and overall aesthetic appearance. Plus, maintaining consistent water levels helps with CO2 distribution in planted setups.
- Sump-based systems
Sump-based systems of any type really shine with ATO systems. Water evaporates faster from sumps due to increased surface area and water movement. The HG229 ATO system review demonstrates how these devices integrate seamlessly with sump configurations.
- Smaller Tanks
Smaller tanks under 20 gallons actually need ATO systems more than larger tanks. Why? Because the same amount of evaporation creates bigger parameter swings in smaller water volumes. A quarter-inch drop in a 10-gallon tank affects salinity much more than in a 100-gallon system.
ATO inside a sump
When Using an ATO Inside a Sump
Installing an ATO inside a sump requires strategic placement. I learned this through trial and error, and getting it right makes all the difference.
The sensor should mount in the return chamber of your sump. This is the section where water returns to the display tank via the return pump. Why here? This chamber experiences the most consistent water level changes as evaporation occurs.
Installation tips for ATO inside a sump:
- Position sensors away from the return pump flow to avoid false readings
- Mount high enough to avoid substrate or debris interference
- Ensure the reservoir sits higher than the sump for gravity-assisted flow
- Keep power cords organized and away from water splash zones
The pump intake goes into your freshwater reservoir. This can be a bucket, jug, or dedicated container. I use a five-gallon bucket that sits next to my tank stand. The HG229 can pump water up to 4.9 feet vertically, which gives flexibility in reservoir placement.
Effective use means monitoring the system initially. Watch how it responds to evaporation. Check that it starts and stops at consistent levels. Adjust sensor placement if needed. After the first week, the system typically runs without intervention.
One thing that is appreciable about using an ATO inside a sump is the discretion. Everything hides in the cabinet below my display tank. Guests see a pristine aquarium, not pumps and sensors cluttering the view.
HG229 ATO system review
HG229 Aquarium ATO System Review
After researching multiple ATO options, I chose the HG229. This aquarium ATO system review reflects several months of daily use.
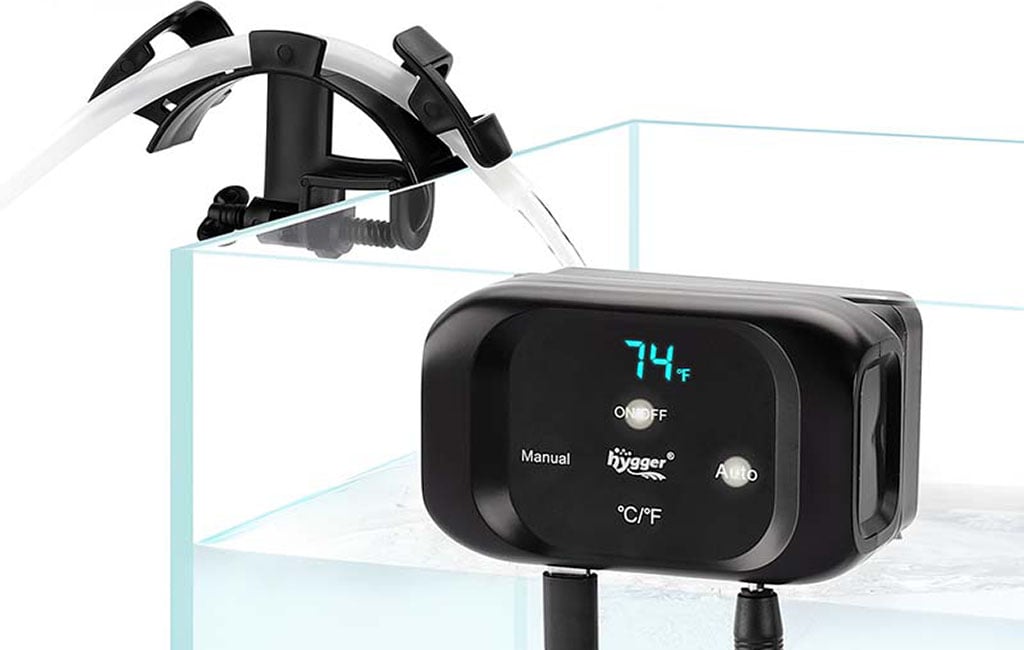
The intelligent monitoring system works exactly as advertised. The dual-sensor setup maintains the water level precisely between the minimum and maximum marks. Set it once, and it has maintained that range consistently.
- Temperature monitoring
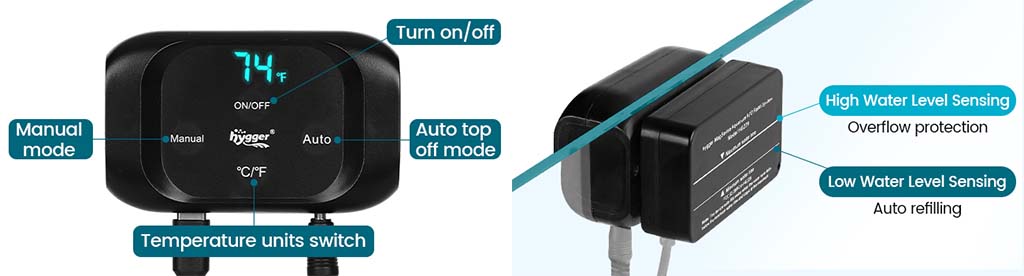
Temperature monitoring was an unexpected bonus. The controller displays the current tank temperature and switches between Fahrenheit and Celsius. The accuracy sits at plus or minus 2 degrees Celsius, which is close enough for monitoring purposes. Not laboratory-grade precision, but useful information at a glance.
- Fail-safe design
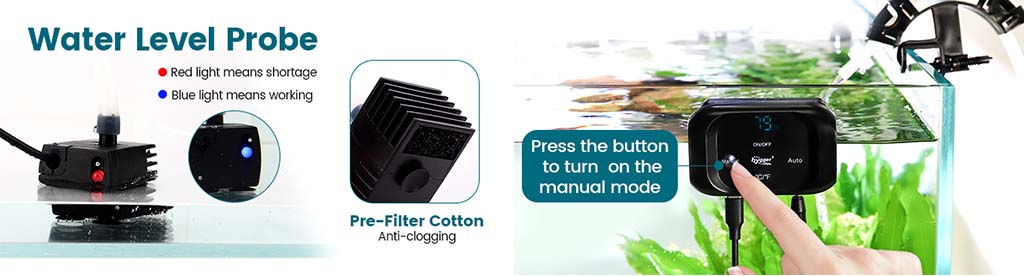
The fail-safe design prevented a potential disaster last month. My reservoir ran empty while I was away for the weekend. The top probe detected the dry condition, flashed a red indicator, triggered a buzzer alarm, and shut down the pump automatically. No dry-running damage, no burned-out motor.
- Manual mode
Manual mode gets used more than I expected. During water changes, I switch to manual control and use the pump to drain water out of the sump into a bucket. Then I refill with fresh saltwater using the same pump. One device, multiple uses. The button controls are simple and responsive.
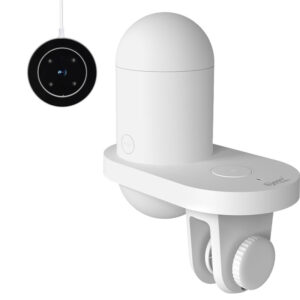
- Magnetic Mounting
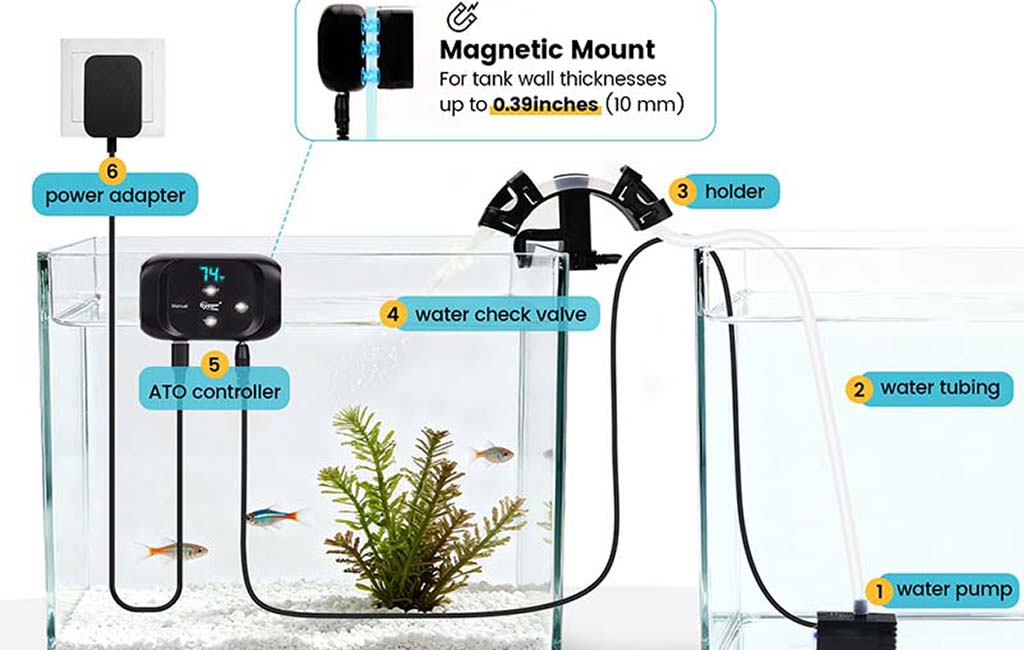
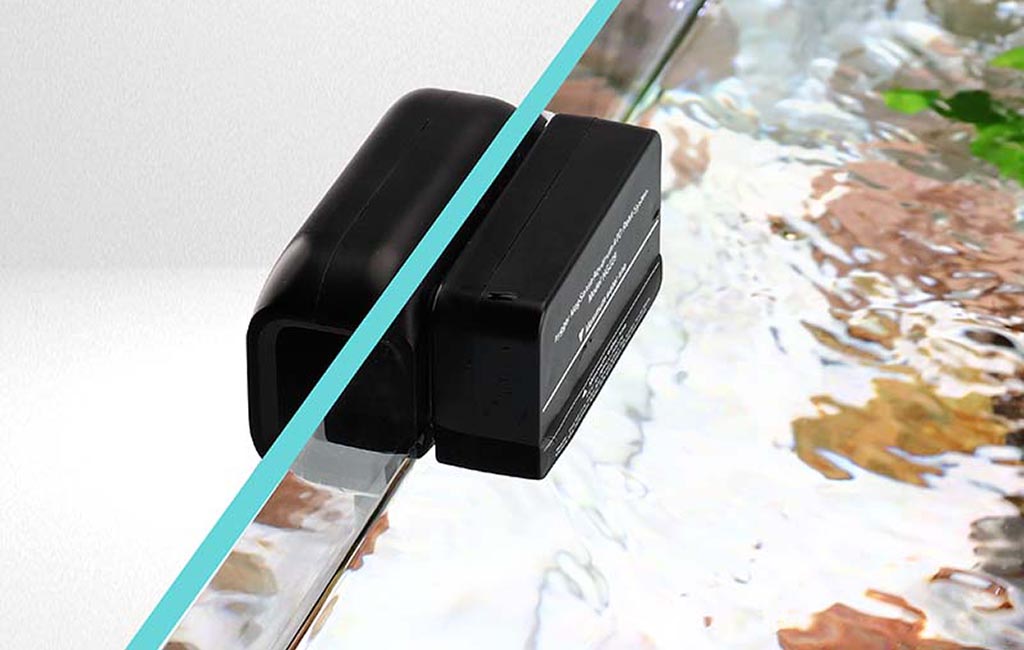
The magnetic mounting system installs easily on glass up to 3/8 inch thick. No drilling, no permanent modifications. The sensors stay in place through daily tank maintenance and cleaning.
- Quiet Pump
The pump itself is quiet and reliable. Some ATO pumps make noticeable clicking sounds when activating. The HG229 runs silently. I only know it is working when I watch the water level rise.
- Anti-interference technology
Anti-interference technology matters more than I initially realized. My wavemaker creates constant surface agitation. Cheaper optical sensors would trigger false readings from these waves and bubbles. The magnetic induction sensors ignore surface disturbance completely.
- Self-Functioning
This system handles vacation periods perfectly. I fill a large reservoir, enable the ATO, and leave for a week without worry. The system maintains stable conditions whether I am home or away.
How to set up ATO
How to Set Up ATO
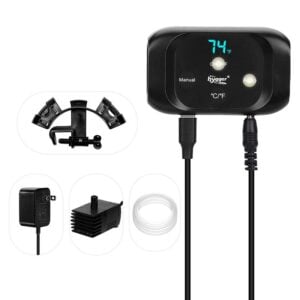
Setting up the HG229 takes about 15 minutes. I will walk through the process that worked for me.
Initial installation steps
- Clean the sensor probe thoroughly before placing it in the tank
- Attach the magnetic holder to the inside glass of your sump or tank
- Position the external magnet on the outside glass to secure the sensor assembly
- Adjust the height so the minimum sensor sits at your desired lowest water level
- Connect the power adapter to the controller unit
- Fill your freshwater reservoir with RO/DI water or dechlorinated tap water
Pump and tubing setup
Place the pump intake in your reservoir. Attach the soft tubing to the pump output. Route the tubing to your sump return chamber. Secure it so the outlet sits below the water surface to prevent splashing and salt creep.
Testing the system
Lower your sump water level below the minimum sensor. The pump should activate immediately. Watch as water refills to the maximum sensor line. The pump should stop precisely at this point.
If the pump continues running past the maximum sensor, check that the sensors are clean and properly positioned. Magnetic interference from nearby equipment can sometimes affect readings. Move the sensor slightly if needed.
Calibration tips
Adjust the sensor height until you find the sweet spot for your specific setup. I wanted a narrow range of about half an inch between minimum and maximum levels. This keeps parameters extremely stable but requires frequent refilling of the aquariums. A wider range means less frequent refills but slightly more parameter variation.
Enable the temperature display and verify it matches a separate thermometer. Remember the plus or minus 4 degrees Fahrenheit accuracy range when comparing readings.
Using an ATO in tanks
Hope It Changes Your Aquarium Journey
Installing an ATO system transformed my daily aquarium routine. No more manual water checks, no more emergency top-offs before work, no more stress about evaporation during travel. The automation handles a tedious but critical task with precision I could never match manually.
My corals show better coloration and growth. My fish seem more relaxed in the stable environment. The HG229 specifically delivered reliable performance at a reasonable cost. If you maintain any aquarium where water evaporation affects water chemistry, an automatic top-off system deserves serious consideration. It frees up mental energy for the enjoyable parts of the hobby.
Related Products


Only goes a couple of days before getting an E5 error. It says the error is caused by a pump running dry, kinked hose, or some other reason. None of these are happening. It’s got a full reservoir, less than 24 inches of head to pump to, and there is no clogs or anything. Runs great for a day or two and then the same error code. Very frustrating for this from a brand new price of equipment.
Sorry for the inconvenience caused.
Would you shoot a video of the issue and send it to [email protected]?
hygger’s customer service is waiting to resolve this issue for you.
Thanks